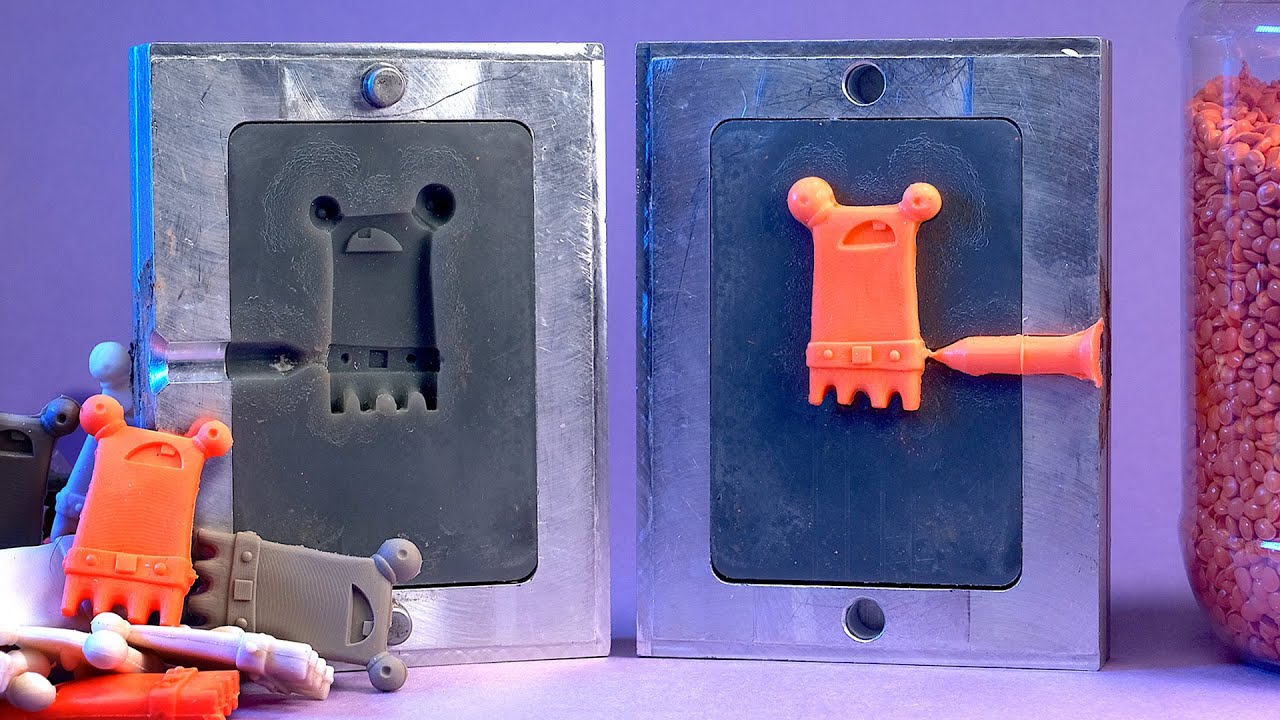
Injection molding is a common manufacturing process used to produce plastic parts at scale. But the high cost of traditional metal molds makes it impractical for prototyping and low-volume production.
Fortunately, advances in 3D printing allow us to print plastic injection molds that can produce accurate parts at a fraction of the cost. In this guide, as a professional plastic injection molding manufacturer, I will share how to design, 3D print, and use a plastic injection mold to create professional-quality prototypes and short-run production.

Why Use a 3D Printed Injection Mold?
Traditionally, injection molds are CNC machined out of tool steel or aluminum. This time-consuming process usually costs upwards of $5,000 per mold. What’s more, any design changes mean starting over from scratch.
3D printing an injection mold instead offers a faster, more affordable path for testing part designs and production workflows. Here’s why it makes sense in many cases:
- Dramatically lower cost. Desktop SLA printers and high-temp resin molds cost roughly 1/10th the price of a machined mold.
- Rapid iterations. 3D printing lets you test tweaks and design changes in a day or two rather than weeks.
- Higher complexity. Organic shapes, custom cooling channels, and other intricate features are no problem.
- Low startup cost. Get into production for less than $5k with a desktop setup.
In short, 3D printed molds unlock low-volume manufacturing opportunities that traditionally weren’t feasible. Keep reading to learn the complete process from start to finish.
How to 3d Print a Plastic Injection Mold
The first step is CAD modeling your injection mold using 3D design software. Your mold design will depend largely on factors like:
- Part geometry
- Required tolerances
- Number of cavities
- Material used
While basic design principles for machined molds also apply to 3D printed tooling, additive manufacturing opens up more complex cooling channel networks and custom geometries.
Here are some best practices to follow:
Eliminate Overhangs
Since 3D printers build objects layer-by-layer, avoid geometry that requires unsupported overhangs during the mold’s build. Overhangs exceeding roughly 45 degrees will require removable supports inside your mold’s cavity.
Include Draft Angles
Just like traditional molds, include a slight draft angle of 1-2 degrees along the walls so parts eject cleanly from the mold.
Design Interlocking Alignment
Add geometric features like pins, alignment keys and frames to precisely align mold halves together. This avoids flashing and ensures an accurate mold shut line.
Strategic Venting
Consider adding shallow vents from the cavity edges to help air escape during injection, minimizing internal pressure in the mold.
Selecting Materials for 3D Printed Molds
Once your design is complete, it’s crucial to select a 3D printing process and material that gives a durable mold and quality injection molded parts.
For short-run molding with accurate details, SLA 3D printing with a high-temp resin generally works best. DLP and material jetting printers are also suitable alternatives in many cases.
High Temp Resins
Specialized high temp resins like Formlabs Clear Resin, which withstands heat deflection temps up to 289°C, make excellent mold materials. They produce fine 0.05mm details suitable for tiny products.
After printing, molds should be annealed to increase heat resistance during the injection process. Annealing involves a controlled, gradual temperature increase to relieve internal stresses from the print without distorting delicate print geometries.
High temp resins enable molding materials like ABS, PP, nylon and more up to 450°C melt temps. Just keep injection pressures low, around 25MPa at most.
Durable Composites
For better surface finish or increased mold longevity, consider composite resins with ceramic, glass or carbon fiber fillers.
Materials like Siraya Tech Blu offer 40% ceramic particle filler for impressive detail and heat resistance exceeding 230°C. Metal-plated composites are also an option, although finish quality from plating is generally inferior to printing.
Best Practices for Injection Molding
With a printed mold designed and material selected, you’re ready to start injection molding test parts. Here are some tips:
Use Release Agent
Applying mold release spray helps parts separate cleanly without sticking or tearing in flexible molds. Be sure to avoid any pooling of release agent inside the mold cavity.
Preheat Mold
If possible, preheating your mold accelerates the injection molding process by decreasing material viscosity upon injection. Just don’t exceed roughly 80% of the resin’s rated HDT.
Low Fill Pressure
Desktop injection molding machines generate far less clamping force than industrial presses. Keep fill pressure below approximately 1500psi to avoid flashing or distorting the mold. Consider modifying machines with smaller nozzles to restrict flow.
Allow Full Cooling
Before demolding, make sure parts have adequately cooled to retain shape integrity. SLA printed molds have lower conductivity than metal, so expect longer cooling times. If possible, accelerate cooling using chilled water lines embedded within printed molds.
Using these best practices along with quality prints and properly designed molds will let you manufacture accurate plastic parts from the convenience of your desktop.
While industrial volumes still rely on conventional metal molds, additive manufacturing empowers engineers to inexpensively test and refine parts as prototypes before reaching that scale. Adopting desktop injection molding unlocks new doors for digital manufacturing.
