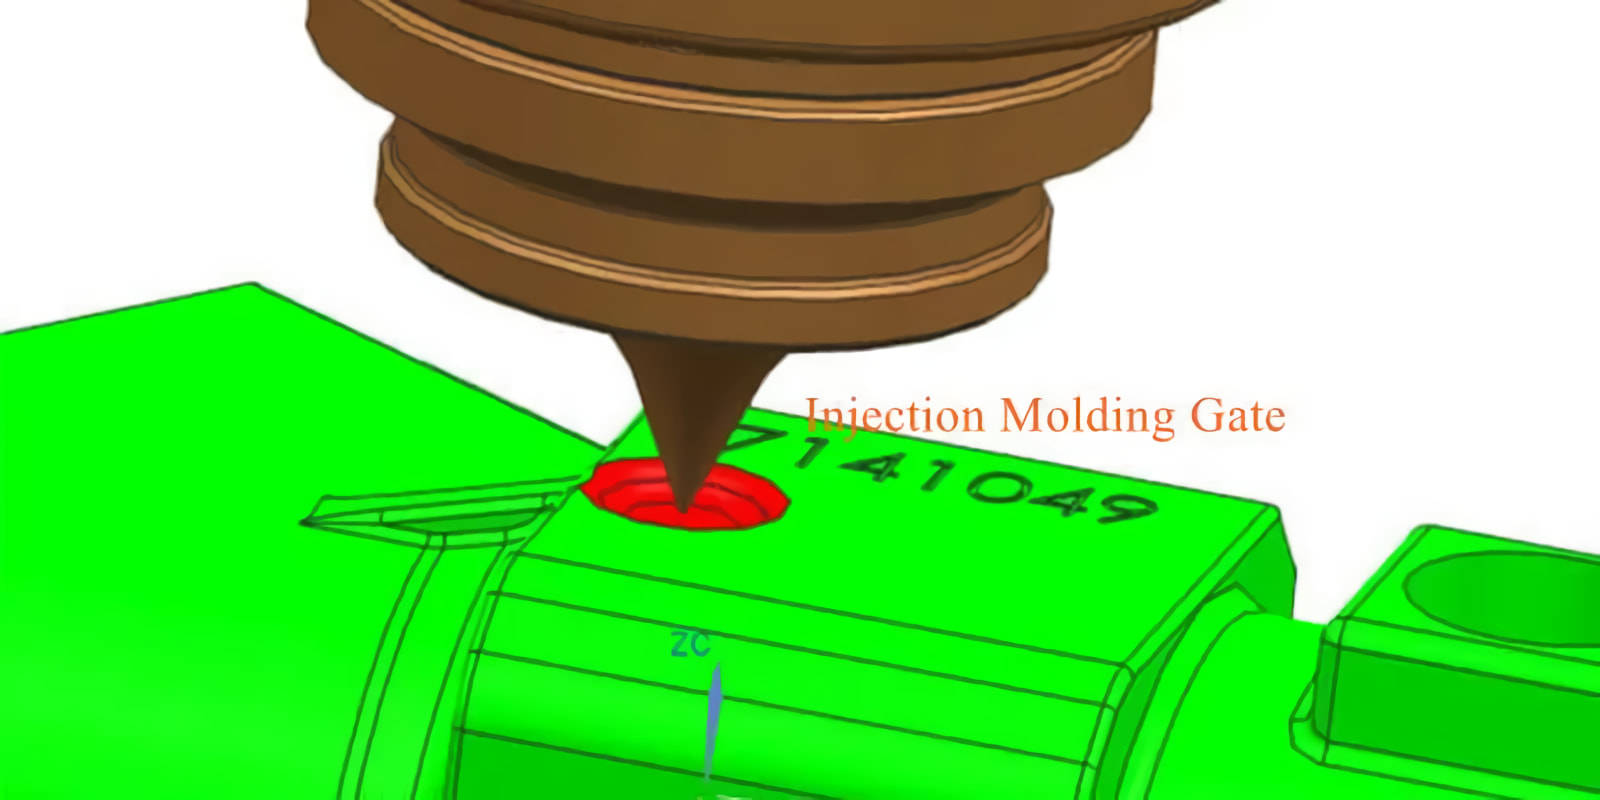
What is a Gate in Injection Molding?
An injection molding gate is a small opening that allows molten plastic to enter the mold cavity during the injection molding process. The gate controls the flow and direction of the plastic as it moves from the runner system into the cavity to form the desired part.
Proper gate selection and placement are critical to achieve complete and uniform mold filling, minimize defects, and produce consistent, high-quality plastic parts. In this beginner’s guide, as a professional injection molding manufacturer, I will share everything you need to know about injection molding gates including different types of gates, gate location considerations, manual vs automatic degating, and more.

Why Gate Design Matters in Injection Molding
When molten plastic enters the mold cavity through the gate during injection molding, it begins to rapidly cool and solidify into the shape of the mold. The gate is typically restricted in size to facilitate separation of the runner system from the finished part.
However, if the gate is too small, it can cause numerous issues:
- Incomplete mold filling – The gate doesn’t allow enough material flow to completely pack out the cavity
- Longer cycle times – Smaller gates increase shear and friction, slowing the fill rate
- Part defects – High shear rates through the gate can degrade material and produce flaws
Conversely, gates that are too large allow the runner system to stay molten for too long after the part has solidified. This prevents the gate from freezing off which can also cause defects.
Gate design directly impacts the injection molding process. Selecting the right size, shape and location is crucial for fast cycle times, lower costs, and quality parts.
Types of Injection Molding Gates
There are many different types of gates used in injection molding. Some of the most common gate varieties include:
Edge Gates
The most frequently used gate type, edge gates are positioned along the perimeter of a part at the mold parting line. They leave a visible witness mark but allow for easy separation from the runner after molding.
Best Uses: Edge gates work well for flat or moderately thick parts and are commonly used with multicavity molds.
Hot Tip Gates
Found exclusively on hot runner molds, hot tip gates deliver molten resin directly to the part at a consistent temperature. They leave a small raised defect on the top surface of parts.
Best Uses: Round, domed, or conical shaped components benefit from the concentric filling pattern of a hot tip gate.
Pin Gates
Uncommon gate variety located on the ejector pin side of the mold (opposite the parting line). Pin gates shear away cleanly leaving virtually no vestige on the finished part surface.
Best Uses: Pin gates allow for automatic degating while eliminating gate marks on cosmetic surface areas.
Submarine (Tunnel) Gates
Featuring an angled, tapered channel, submarine gates fill the mold cavity from underneath the parting line allowing gate marks to be concealed.
Best Uses: Submarine gates help hide gate blemishes and are useful for small, high cavitation molds.
Where Should Gates Be Located?
While gate types differ drastically, gate placement also matters when manufacturing injection molded components.
Here are some best practices all mold designers should follow:
- Position the gate at the thickest section of a part whenever possible
- Keep gates far from ejector pins, cores, slides to prevent flow interruptions
- Allow sufficient space for gate removal operations
- Use multiple gates to improve balancing of flows/pressures
Locating gates improperly can negatively impact part quality, extend cycle times, and drive up production costs. Careful gate placement is a critical aspect of any mold design.
Manual vs Automatic Gate Removal
As touched on earlier, gates require removal from finished plastic parts after injection molding. This secondary process is known as degating.
Degating operations typically fall into one of two categories:
Manual Degating
The most basic form of gate removal, manual degating relies on an operator to physically cut, trim, break or twist gates from molded parts. While universal, it drives up labor costs and can damage fragile components.
Best for: Prototyping, bridge tooling, large gates, or customizable trim requirements
Automatic Degating
For high production applications, automatic degating detaches gates during mold open or part ejection. Robots then handle finished parts for downstream operations. Removing human involvement speeds cycles times and cuts costs.
Best for: High volume production, multi-cavity molds, small gates
Understanding how gates will be removed allows for optimal mold and part design. Manual vs automatic degating affects cycle efficiency, labour requirements, and overall part quality.
Conclusion
Hopefully this beginner’s guide has provided you with a solid foundational understanding of injection molding gates.
To quickly recap:
- Gates control the flow of molten plastic from runners into mold cavities
- Proper gate sizing prevents short shots while enabling complete cavity packing
- Popular gate varieties include: edge gates, hot tip gates, pin gates and submarine gates
- Gate location influences fill patterns, cycle efficiency, cosmetics
- Degating parts can be done manually or automatically with tradeoffs for each method
Armed with this knowledge, you can make educated gate selections for your next injection molded component or mold design. As always, leaning on an experienced manufacturing partner helps avoid missteps when working with this precise process.
What aspect of gate design still remains unclear? Let me know in the comments section below!
