Mantenere puliti gli stampi per iniezione plastica è assolutamente fondamentale per produrre pezzi di alta qualità e prolungare la durata degli stampi. In questa guida completa, come professionista stampaggio a iniezione di plastica Il produttore vi illustrerà passo per passo l'intero processo di pulizia degli stampi a iniezione di plastica.
Prima di tutto, vediamo rapidamente perché la pulizia corretta degli stampi a iniezione è così importante.
Perché la pulizia degli stampi a iniezione è così importante
Quando la plastica viene iniettata ad alte temperature e pressioni, residui, contaminanti e prodotti di degradazione si accumulano inevitabilmente all'interno dello stampo nel corso di cicli ripetuti. Questi residui possono:
- Degrado della qualità dei pezzi - Qualsiasi imperfezione sulla superficie dello stampo può trasferirsi ai pezzi.
- Riduzione dell'efficienza di raffreddamento - L'accumulo nei canali di raffreddamento riduce il trasferimento di calore.
- Causa problemi di sfiato: il materiale che ostruisce le vie di sfiato provoca scatti brevi.
- Causa di gallamento e usura - L'attrito, l'abrasione e la corrosione danneggiano l'acciaio dello stampo.
Pulendo a fondo lo stampo con regolarità, si prevengono questi problemi che portano a una migliore stabilità del processo, a una riduzione degli scarti e a una maggiore durata dello stampo.
Qual è il modo migliore per pulire uno stampo a iniezione?
Ho testato praticamente tutti i metodi in circolazione, dallo sfregamento manuale alla pulizia a ultrasuoni. In base alla mia esperienza, ecco il processo passo-passo più efficace...
Come pulire gli stampi a iniezione di plastica
Fase 1: smontaggio dello stampo
Prima di procedere alla pulizia, smontare completamente lo stampo separando le metà della cavità e del nucleo. In questo modo si espongono tutte le superfici e si può accedere agli sfiati, ai perni di espulsione, ecc.
Se non è possibile rimuovere completamente alcuni componenti, separarli almeno lungo la linea di separazione.
Fase 2: rimozione della contaminazione sciolta
Utilizzare un raschietto di plastica o una spazzola di ottone per rimuovere i detriti di grandi dimensioni e gli strati di residui più spessi.
Evitare l'uso di materiali più duri o abrasivi per non danneggiare l'acciaio dello stampo. Lavorare con attenzione sulle superfici strutturate.
Fase 3: Selezione di un detergente appropriato
Per la maggior parte dei residui, un detergente per muffe come Klüber Mold Protector funziona molto bene. È stato progettato per rimuovere plastica, lubrificanti e agenti distaccanti senza essere eccessivamente aggressivo.
Utilizzare un detergente appositamente formulato per gli stampi a iniezione invece di sgrassatori generici che possono degradare i rivestimenti protettivi nel tempo.
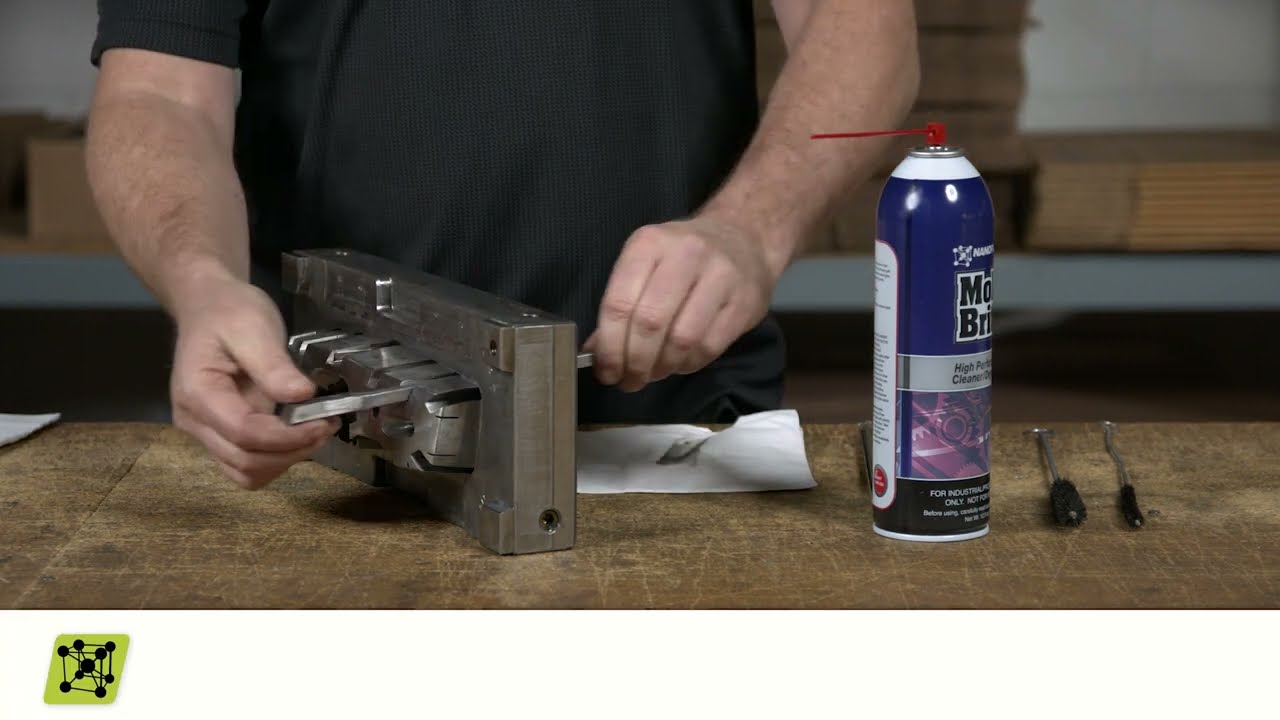
Fase 4: Pulizia manuale
Applicare una quantità generosa di detergente per muffe, quindi strofinare con una spazzola a setole morbide e stracci di cotone. Assicurarsi di lavorare in ogni cavità, nucleo, canale di ventilazione, ecc. In questo modo i contaminanti vengono disaggregati per essere successivamente rimossi.
Ripetere il processo se necessario su aree molto sporche, ma evitare di strofinare eccessivamente le superfici strutturate.
Fase 5: risciacquo
Risciacquare accuratamente tutte le tracce di detergente con acqua calda e stracci di cotone puliti. Fate attenzione: eventuali residui lasciati sullo stampo possono trasferirsi in seguito alle parti in plastica.
L'aria compressa può aiutare a liberare le aperture e i fori se si dispone di una pistola ad aria compressa.
Fase 6: asciugatura
Lasciare asciugare completamente lo stampo prima di riassemblarlo. Di solito posiziono i pezzi su una rastrelliera in un'area calda con flusso d'aria. È possibile accelerare questa operazione utilizzando un riscaldatore portatile o una pistola termica.
Evitare di lasciare che l'acqua si accumuli o che le gocce rimangano sullo stampo.
Fase 7: ispezione finale
Prima di avviare la produzione con lo stampo pulito, eseguire un'ispezione visiva finale alla ricerca di eventuali residui di sporco o contaminanti.
Controllate anche eventuali segni di usura, danni o corrosione per risolvere questi problemi prima che il problema si trasferisca ai vostri componenti.
Consigli professionali per mantenere pulite le muffe
Ecco alcuni consigli aggiuntivi per mantenere puliti gli stampi a iniezione e prevenire futuri accumuli:
- Utilizzare il distaccante per stampi - L'applicazione di un distaccante di qualità tra una tiratura e l'altra evita che la plastica si attacchi.
- Rimanere al passo con i cicli - Non lasciare che si formino accumuli eccessivi prima della pulizia.
- Filtrare l'acqua di raffreddamento - La rimozione dei solidi impedisce l'incrostazione dei canali.
- Avere un piano di PM - Programmare la pulizia offline almeno ogni 2 anni.
Conclusione
La corretta pulizia degli stampi per iniezione di materie plastiche è una delle attività a più alto ROI che uno stampatore possa fare.
Massimizza la produttività consentendo una lavorazione costante senza interruzioni dovute a problemi di sfiato, problemi dimensionali o difetti estetici legati a residui e contaminazione.
Inoltre, si preservano le superfici lucidate di precisione, essenziali per il successo dello stampaggio a iniezione, riducendo l'abrasione e la corrosione.
Seguendo questa guida completa Come pulire uno stampo a iniezione Il processo di produzione e di manutenzione dello stampo è in grado di mantenere lo stampo in condizioni operative ottimali, per garantire una produzione impeccabile e una durata di vita molto più lunga.
Fatemi sapere nei commenti se avete altri consigli per la pulizia degli stampi a iniezione che dovrei aggiungere!