Ammettiamolo:
Il Processo di stampaggio a iniezione del PET è complicato. Se sbagliate un parametro, vi ritroverete con pezzi fragili e torbidi che andranno buttati nel bidone della spazzatura.
Ma ecco la buona notizia:
Una volta comprese le basi, è possibile creare preforme e contenitori cristallini in grado di competere con qualsiasi altro prodotto sul mercato.
In questa guida, come Produttore di stampaggio a iniezione di PETvi mostrerò esattamente come padroneggiare lo stampaggio a iniezione del PET. Comprese le temperature, le pressioni e le tecniche esatte che funzionano effettivamente nel 2025.
Sembra una buona idea? Immergiamoci.
Che cos'è lo stampaggio a iniezione del PET?
Lo stampaggio a iniezione del PET è un processo di produzione in cui si inietta il polietilene tereftalato fuso in uno stampo per creare parti in plastica.
Vedetela così:
In pratica, si fondono pellet di plastica e li si spruzza in una cavità metallica. Quando si raffredda, si ottiene un pezzo di plastica.
Ma è qui che la cosa si fa interessante:
Il PET non è come le altre plastiche. È igroscopico (cioè ama l'acqua). E se non lo trattate bene, vi punirà con difetti che vi faranno venire voglia di abbandonare del tutto lo stampaggio a iniezione.
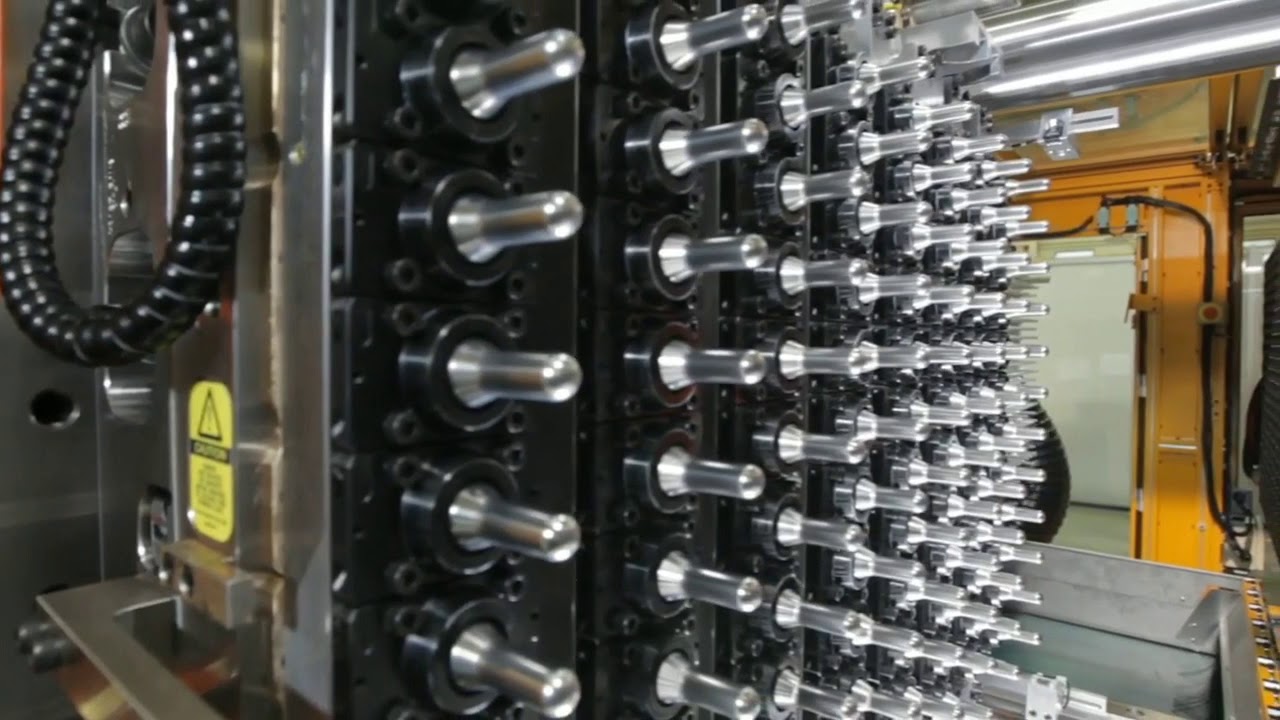
L'uso più comune? Creare preforme in PET, quelle cose dall'aspetto di provette che poi vengono soffiate in bottiglie.
Perché lo stampaggio a iniezione del PET è diverso
Ecco come funziona:
Lo stampaggio a iniezione del PET presenta una serie di sfide specifiche. E se siete abituati a lavorare con materiali come l'ABS o il polipropilene, vi aspetta una sorpresa.
Il primo: Asciugatura del materiale.
Il PET assorbe l'umidità come una spugna. Stiamo parlando di livelli di umidità che devono essere inferiori a 0,02% prima della lavorazione. Altrimenti? Si otterrà l'idrolisi: in pratica, la plastica si rompe a livello molecolare.
Il prossimo: Controllo della temperatura.
Il PET necessita di temperature di lavorazione più elevate rispetto alla maggior parte delle materie plastiche. Si parla di 270-295°C (518-563°F) per la temperatura di fusione. Ma ecco il punto cruciale: se si sale troppo, il materiale si degrada.
Infine: Cristallizzazione.
Questo è il problema principale. Se il PET si raffredda troppo lentamente, si cristallizza e diventa bianco e fragile. Ecco perché è necessario un raffreddamento rapido e basse temperature di stampo.
Il processo di stampaggio a iniezione del PET passo dopo passo
Ora analizziamo il processo vero e proprio.
Ho visto troppi operatori saltare dei passaggi e chiedersi perché i loro pezzi hanno un aspetto terribile. Quindi, seguite esattamente questa procedura:
Fase 1: Preparazione del materiale (la fase "make or break")
Ricordate quando ho detto che il PET ama l'acqua? Ecco come rimediare.
È necessario essiccare i pellet in PET in un essiccatore a deumidificazione per 4-6 ore a 160-180°C. E non sto parlando di gettarli in un essiccatore qualsiasi. È necessario un essiccatore in grado di ottenere livelli di umidità inferiori a 0,02%.
Suggerimento: utilizzate un analizzatore di umidità per verificare che i pellet siano effettivamente asciutti. Non fidatevi solo del timer.
Fase 2: Impostazione della macchina
La macchina per lo stampaggio a iniezione necessita di impostazioni specifiche per il PET:
Impostare le temperature della canna a zone. Iniziare con 260-290°C nella parte posteriore e arrivare a 280-300°C all'ugello. In questo modo si crea il gradiente di temperatura perfetto per la fusione senza degradazione.
Mantenete la velocità della vite bassa, intorno ai 50-80 giri/min. Velocità elevate creano calore di taglio che può degradare il materiale.
Ecco una cosa che sfugge alla maggior parte delle persone: Utilizzare una vite con un basso rapporto di compressione (da 2:1 a 2,5:1). Il PET non ha bisogno di una miscelazione aggressiva come quella di altre materie plastiche.
Fase 3: Controllo della temperatura dello stampo
È un aspetto critico:
La temperatura dello stampo deve essere compresa tra 10-40°C. Sì, è fredda. Si sta cercando di prevenire la cristallizzazione, ricordate?
La maggior parte delle operazioni utilizza un sistema di refrigerazione per mantenere temperature precise. E quando dico precise, intendo entro ±1°C. Variazioni di temperatura = variazioni di qualità.
Fase 4: la fase di iniezione
Quando si è pronti per l'iniezione:
Utilizzare velocità di iniezione elevate per riempire rapidamente lo stampo. Si parla di 100-200 mm/s. Più veloce è il riempimento, meno tempo ha il materiale per raffreddarsi e cristallizzarsi nel sistema di canali.
La pressione di iniezione dovrebbe essere compresa tra 1000 e 1400 bar. Iniziare con la pressione più bassa e aumentarla fino a ottenere un riempimento completo senza lampi.
Fase 5: Mantenimento e raffreddamento
Dopo l'iniezione, applicare una pressione di mantenimento per 5-15 secondi. In questo modo si compensa il ritiro del materiale e si garantisce la precisione dimensionale.
Poi viene il raffreddamento. Per le applicazioni a parete sottile, il raffreddamento richiede 5-10 secondi. Per le preforme più spesse, potrebbero essere necessari 20-30 secondi.
La chiave? Un raffreddamento uniforme. I punti caldi causano deformazioni e problemi dimensionali.
Fase 6: espulsione
Una volta raffreddato, lo stampo si apre e i perni di espulsione spingono fuori il pezzo.
Assicuratevi che il vostro sistema di espulsione sia sottoposto a una manutenzione adeguata. Perni di espulsione appiccicati = pezzi danneggiati e ritardi di produzione.
Difetti comuni dello stampaggio a iniezione del PET (e come risolverli)
Lasciate che vi risparmi qualche grattacapo.
Ecco i difetti più comuni che vedo e come risolverli:
Parti nuvolose o opache: Il materiale è troppo umido. Asciugare nuovamente i pellet e controllare il punto di rugiada dell'essiccatore.
Decolorazione gialla: La temperatura è troppo alta o il tempo di permanenza è troppo lungo. Abbassare le temperature della botte di 5-10°C e ridurre il tempo di ciclo.
Fragilità: Potrebbe trattarsi di umidità, degrado o cristallizzazione. Controllate tutti e tre: contenuto di umidità, temperature di lavorazione e velocità di raffreddamento.
Scatti brevi: Aumentare la pressione o la velocità di iniezione. Controllare anche che il materiale sia fuso correttamente.
Segni di lavandino: Aumentare la pressione e il tempo di tenuta. Assicurarsi che il cancello non si blocchi troppo presto.
Tecniche avanzate per risultati migliori
Volete portare lo stampaggio a iniezione del PET a un livello superiore? Ecco cosa fanno i professionisti:
Sistemi a canale caldo
Dimenticate i canali freddi. I sistemi a canale caldo mantengono il PET fuso fino al cancello. Ciò significa che:
- Meno sprechi di materiale
- Tempi di ciclo più rapidi
- Migliore qualità dei pezzi
Sì, sono più costosi all'inizio. Ma il ritorno sull'investimento è solitamente inferiore ai 12 mesi per la produzione di alti volumi.
Tecnologia delle valvole a saracinesca
Per le applicazioni di alta qualità, le valvole a saracinesca consentono un controllo preciso del processo di iniezione. È possibile mettere in sequenza più gate, eliminare i segni dei testimoni e ottenere una migliore estetica.
Etichettatura in stampo
Ecco un trucco: è possibile aggiungere etichette durante il processo di stampaggio. L'etichetta diventa parte della parete del contenitore, offrendo opzioni di decorazione che lo stampaggio per soffiatura non può eguagliare.
PET vergine vs. PET riciclato: Cosa c'è da sapere
Nel 2025 la sostenibilità non è un optional.
Sempre più marchi richiedono contenuti riciclati. Ma il problema è che il rPET si comporta in modo diverso dal materiale vergine.
Caratteristiche del PET riciclato:
- Diversa portata di fusione (di solito inferiore)
- Può contenere impurità
- Limitazioni del colore
- Richiede parametri di elaborazione adattati
La buona notizia? La moderna tecnologia di riciclaggio è migliorata notevolmente. Oggi è possibile ottenere rPET con prestazioni quasi pari a quelle del materiale vergine.
Il mio consiglio: Iniziare con una miscela (forse 25% rPET) e salire man mano che si perfeziona il processo.
L'economia dello stampaggio a iniezione del PET
Parliamo di soldi.
Lo stampaggio a iniezione del PET richiede un investimento iniziale significativo:
- Macchine specializzate per lo stampaggio a iniezione: $100,000-$500,000
- Attrezzatura per l'essiccazione: $20,000-$50,000
- Stampi: $30.000-$200.000 per stampo
- Attrezzature ausiliarie: $50,000-$100,000
Ma ecco perché ne vale la pena:
Il mercato degli imballaggi in PET è enorme. Si parla di oltre $80 miliardi a livello globale. E con il passaggio di sempre più prodotti al PET per motivi di sostenibilità, la domanda continua a crescere.
Inoltre, lo stampaggio a iniezione del PET è incredibilmente efficiente. I tempi di ciclo di 10-20 secondi consentono di produrre migliaia di pezzi all'ora.
Tendenze future nello stampaggio a iniezione del PET
Guardando al resto del 2025 e oltre, ecco cosa ci aspetta:
Soluzioni 100% rPET: La tecnologia sta finalmente raggiungendo un livello tale da rendere fattibile il contenuto riciclato 100% per le applicazioni alimentari.
Stampaggio intelligente: Controllo di processo con intelligenza artificiale che regola automaticamente i parametri per ottenere una qualità ottimale.
Efficienza energetica: Nuovi progetti di macchine che utilizzano 30-40% meno energia pur mantenendo le prestazioni.
Alleggerimento: Pareti più sottili senza sacrificare la resistenza, grazie a migliori formulazioni dei materiali e al controllo dei processi.
Come iniziare con lo stampaggio a iniezione del PET
Siete pronti a tuffarvi? Ecco il vostro piano d'azione:
- Iniziate con un addestramento adeguato. Il PET non perdona e gli errori sono costosi.
- Investite in attrezzature di essiccazione di qualità. Questo non è negoziabile.
- Scegliere la macchina giusta. Cercatene una con caratteristiche specifiche per il PET, come viti a bassa compressione e controllo preciso della temperatura.
- Collaborate con fornitori di materiali che conoscono il PET. Possono aiutarvi a risolvere i problemi e a ottimizzare il processo.
- Iniziare in modo semplice. Imparate a conoscere le preforme di base prima di passare a geometrie complesse.
Il bilancio
Il Processo di stampaggio a iniezione del PET può sembrare complesso all'inizio. Ma una volta comprese le nozioni fondamentali (corretta essiccazione, controllo della temperatura e raffreddamento rapido), tutto diventa gestibile.
Ricordate: Il PET non perdona se si prendono scorciatoie. Ma se lo trattate bene, produrrete pezzi cristallini, dimensionalmente stabili e perfetti per l'applicazione cui sono destinati.
Che si tratti di produrre preforme per bottiglie, contenitori per cosmetici o imballaggi a parete sottile per alimenti, la padronanza di queste tecniche vi distinguerà dalla concorrenza.
E nel mercato del 2025 incentrato sulla sostenibilità? Questa competenza è più preziosa che mai.