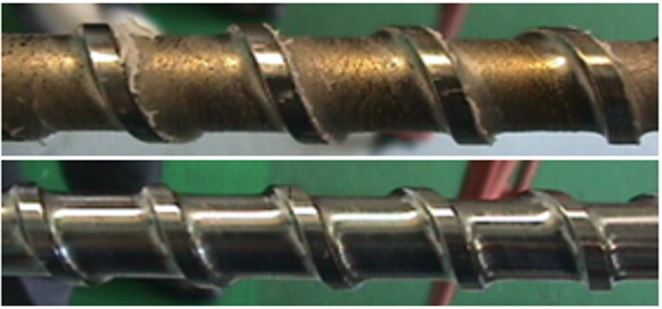
Injection molding is one of the most common manufacturing processes used today. From cars to toys to medical devices, injection molded parts are everywhere.
But like any manufacturing process, issues can arise that affect quality and efficiency. One of the most common issues is the buildup of contaminants inside the injection molding machine, like degraded plastic resin, colorants from a previous run, or carbonized plastic.
This residue can lead to defective parts, increased scrap, and downtime to stop and clean out the machine. That’s where purging comes in – a critical step to keeping your injection molding process running smoothly. As a professional plastic injection molding manufacturer, I will share it in this article.

What is Purging in Injection Molding?
Purging is the process of cleaning out all the channels inside an injection molding machine to remove contaminants between material and color changeovers.
Specifically, purging clears out residue from areas like:
- Barrel
- Screw
- Nozzle
- Hot runner
- Flow paths
Purging removes all traces of the old plastic resin or colorant so that the next job isn’t contaminated. This avoids issues like:
- Discolored parts from color cross-contamination
- Black specks from degraded material
- Parts with poor appearance and properties
By thoroughly cleaning out the injection molding machine, purging ensures the highest quality on your next job.
Why is Purging Necessary in Injection Molding?
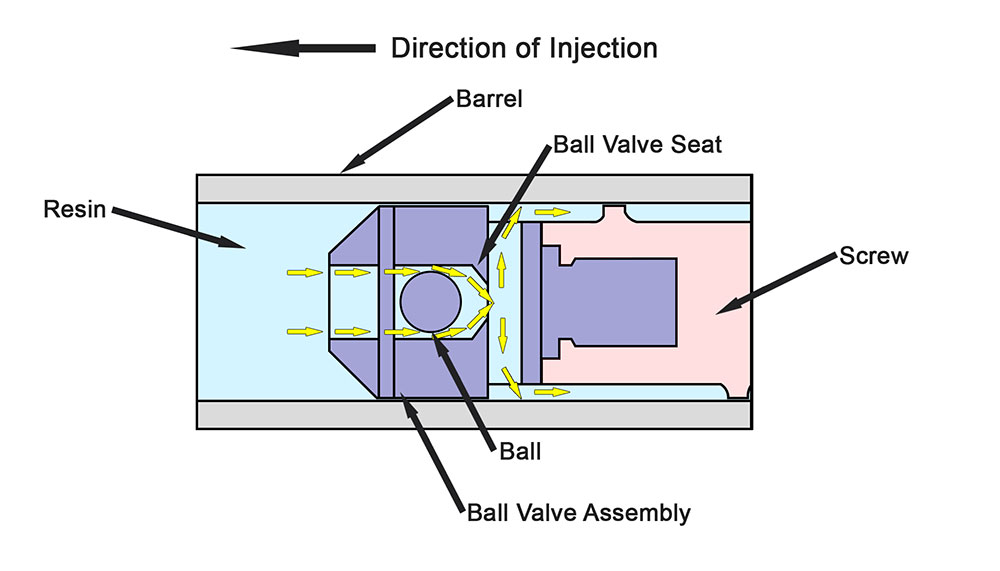
Plastic injection molding machines have long flow paths that easily collect residue during molding:
Resin Path During Injection Molding

Small amounts of degraded resin, leftover colorant, or contaminants from previous jobs remain behind after a run ends. Over time, this buildup accumulates and leads to several issues:
1. Defective Parts
Carbonized material, cross-contamination, and other residue in the injection molder degrades part quality. You may notice:
- Discolored parts
- Black specks
- Sink marks
- Voids
- Weak weld lines
Scrap parts waste time and money. Purging clears out contaminants for consistent quality.
2. Material Waste
Starting a job with residue already in the machine means contaminants mix into the new resin or colorant. This leads to increased scrap as you purge out bad material.
Thoroughly purging first avoids wasting good plastic.
3. Long Changeovers
Taking too long between jobs cuts into production time. Lengthy changeovers to purge out machines by trial and error reduce available run time.
Using an optimized purging process minimizes changeover time.
4. Costly Downtime
Excessive machine cleaning to clear heavy buildup of degraded resin or colorants requires shutting down production. The longer the machine is out of service, the more money you lose.
Regular purging avoids lengthy downtime and keeps machines running.
By thoroughly cleaning out injection molders before product changeovers, purging is a critical step for quality, efficiency, and minimizing costs.
What is Used to Purge Injection Molders?
Purging requires a material that flows easily through the system to wash out contaminants without leaving any residue itself. Three main options exist:
1. Production Resin
Using the next job’s plastic resin or regrind is an option for purging injection molding machines. However, good material is wasted before production even begins.
The large amount of quality plastic required to properly purge makes this an expensive choice.
2. Low-Cost Polymers
Some molders use low-cost polymers like polyethylene (PE) or polypropylene (PP) to save on material. However, these don’t always purge thoroughly, take longer, and still result in some waste.
PET bottle flake is another cheap option but requires drying and creates hazadous dust.
3. Commercial Purging Compounds
Specialized purging compounds are engineered for quickly and effectively cleaning injection molding machines.
They are:
- Non-abrasive – Don’t scratch machine surfaces
- Non-sticky – Rinse freely from equipment
- Economical – Use only small amounts
- Reusable – Can be reprocessed after purging
By saving time, avoiding waste, and keeping machines running efficiently, commercial purging compounds are the top choice for most injection molders.
Step-By-Step Injection Molding Purging Process
To avoid problems and keep your injection molding process running smoothly, purging should be conducted every time resins or colors change over.
Here is the complete purging procedure:
Step 1: Prepare the Machine
Before introducing purge compound, prepare the injection machine:
- Retract the screw to clear the barrel
- Run any remaining plastic out until empty
- Turn heating zones to purge compound recommended temps
- Check machine settings like speed, pressure, position
- Clean hopper and feed throat
This avoids any chance of contamination and ensures optimal purge performance.
Step 2: Load Purge Compound
With machine prepped, add purge compound to the hopper:
- Add 1-2 barrel volumes of purge compound
- Forward the screw
- Turn on screw rotation and heating zones
The purge material will melt and fill the system, surrounding all remaining contaminants.
Step 3: Purge Until Clean
Now the purging process begins:
- Increase injection speed and pressure
- Open purge point valves if possible
- Allow purge compound to soak at high temp for improved cleaning
- Continue cycling injections of compound until it runs clean
Work the purge all through the system until no signs of degradation or discoloration remain.
Step 4: Clear Out Purge Material
With machine clean, clear it out:
- Reduce pressure and injection speeds
- Run remaining compound out through nozzles
- Empty hopper and feed section
This leaves the injection molder entirely empty and prepared for the next production job.
By following this complete purging procedure for injection molding, you remove all contaminants between runs for optimum quality and efficiency.
Purging Injection Molding Machines: Key Takeaways
- Purging is the process of cleaning out residue inside injection molders during color or material changeovers.
- Buildup of contaminants leads to scrap parts, material waste, slow changeovers, and downtime.
- Specialized purging compounds quickly remove all traces of contamination.
- A step-by-step process is followed to thoroughly clean equipment for the next run.
- Consistent purging keeps injection molding processes smooth and efficient.
Performing purging in your injection molding operations avoids problems between runs and improves quality control. This saves on material costs and keeps the machines running optimally.
What is purging in injection molding? It clears out all contaminants, avoiding issues from degraded materials or cross-contamination between jobs. By investing in the proper purging process, your injection molding line will produce consistent, top-quality parts run after run.
